First steps
You got your hands on Application Collection, yet you don’t really know what is it about or how to get started. Don’t worry, we got you covered! In this guideline you will learn about this product, how to get an account and how to use it from a developer-friendly perspective.
What is Application Collection?
At the moment of writing, our landing page says the following:
A curated, trusted and up-to-date collection of developer and infrastructure applications built, packaged, tested and distributed by SUSE. Available as part of SUSE Rancher Prime.
Let’s put this in a less marketing-oriented message:
- A curated, trusted and up-to-date collection of developer and infrastructure applications
- A […] collection of developer and infrastructure applications: from a developer perspective, you can see Application Collection as a set of building blocks for creating cloud-native solutions. We offer OCI-conformant artifacts, that is, single containers and Helm charts .
- Curated: our collection contains - what we believe is - the best set of open source applications for development and production use cases. We are selective in our choice of open-source software to provide you with only the best / most popular options for every requirement.
- Trusted: every artifact we deliver is designed with the least attack surface possible. The least dependencies, and their latest versions are included in our distributables to make sure we ship the least CVEs as possible. On top of that, we perform continuous vulnerability scans with different tools.
- Up-to-date: we keep the collection updated in three dimensions: base image, dependencies and application wise. Whenever any of those gets an update, we rebuild the necessary distributables and publish new artifacts.
- built, packaged, tested and distributed by SUSE: every piece of software delivered by Application Collection has been built internally in SUSE, using the very same tools that we use for our industry leading Common Criteria EAL4+ certified OS. This includes the base image, the dependencies and the application itself. Every new application is tested by our development team before its release. The whole build pipeline conforms with Level 3 (the highest level) in the Supply chain Levels for Software Artifacts (SLSA) framework .
How can I get a user account?
At this point you should know what the product is, now it’s time to get your user account!
Application Collection is fully integrated for user management with SUSE Customer Center (SCC). Hence, if you are already a SUSE customer and have an account in SCC you can use those credentials to login in the web application .
If you do not have an account in SCC yet, creating one is very simple:
Open the SUSE Customer Center
In your browser of choice and click on Register. You will be redirected to a form requesting some information to create your account.
Create your account
Fill in the form and click on Create Account. Once the form is successfully submitted, you will receive an email containing an activation link.
Activate your account
Open your email inbox and click on the activation link. This will redirect you to a page where you can set your password. Introduce a password matching the stated policy to complete the registration process.
Congratulations! You are now successfully registered and can use your SCC credentials to log into the web application .
Authentication methods
As a developer, there are three main ways you can interact with Application Collection.
Web application
You will find this useful for browsing applications , getting artifact details , or configuring your account .
Although the vast majority of the web application is public, there are some parts that require authentication. You already saw here that you can authenticate to the web application with your user account, using your username and password.
Distribution Platform
The best way to consume content from Application Collection is by using an OCI client such as docker, helm, Kubernetes…
For this, you need to configure your OCI client to authenticate to the Distribution Platform. This can be done with a user account or a service account.
If you want to authenticate in behalf of yourself, you should use your user account. In this case, you need to create an access token and authenticate using your username + access token. Using access tokens is a safer way of managing your credentials: at any point you can delete an access token stored anywhere, and the rest of them will remain fully functional.
On the contrary, if you want to configure your OCI client for machine-to-machine interaction, we recommend using a service account. In this case, you should authenticate using the username + secret of the service account, which are provided at creation time.
REST API
The REST API is useful when you need to integrate your system with Application Collection. There are currently two API definitions:
- The Metadata Service API provides endpoints to gather information mostly related to applications, components, artifacts and their metadata.
- The Accounting Service API provides endpoints to interact with users and service accounts.
Although many of the endpoints available in the REST API are public, others require authentication. Similar to the Distribution Platform, the REST API allows authenticating using your user account (username + access token) or a service account (username + secret).
Hello World
In this section we will deploy NGINX serving a Hello World page.
Pulling content from Application Collection requires authenticating to the Distribution Platform. Hence, before following this guideline you
should make sure that you have already created your user account an access token for it, and logged in to Application Collection with docker
using those credentials.
First, let’s open up the NGINX application details page to see what versions we can use:
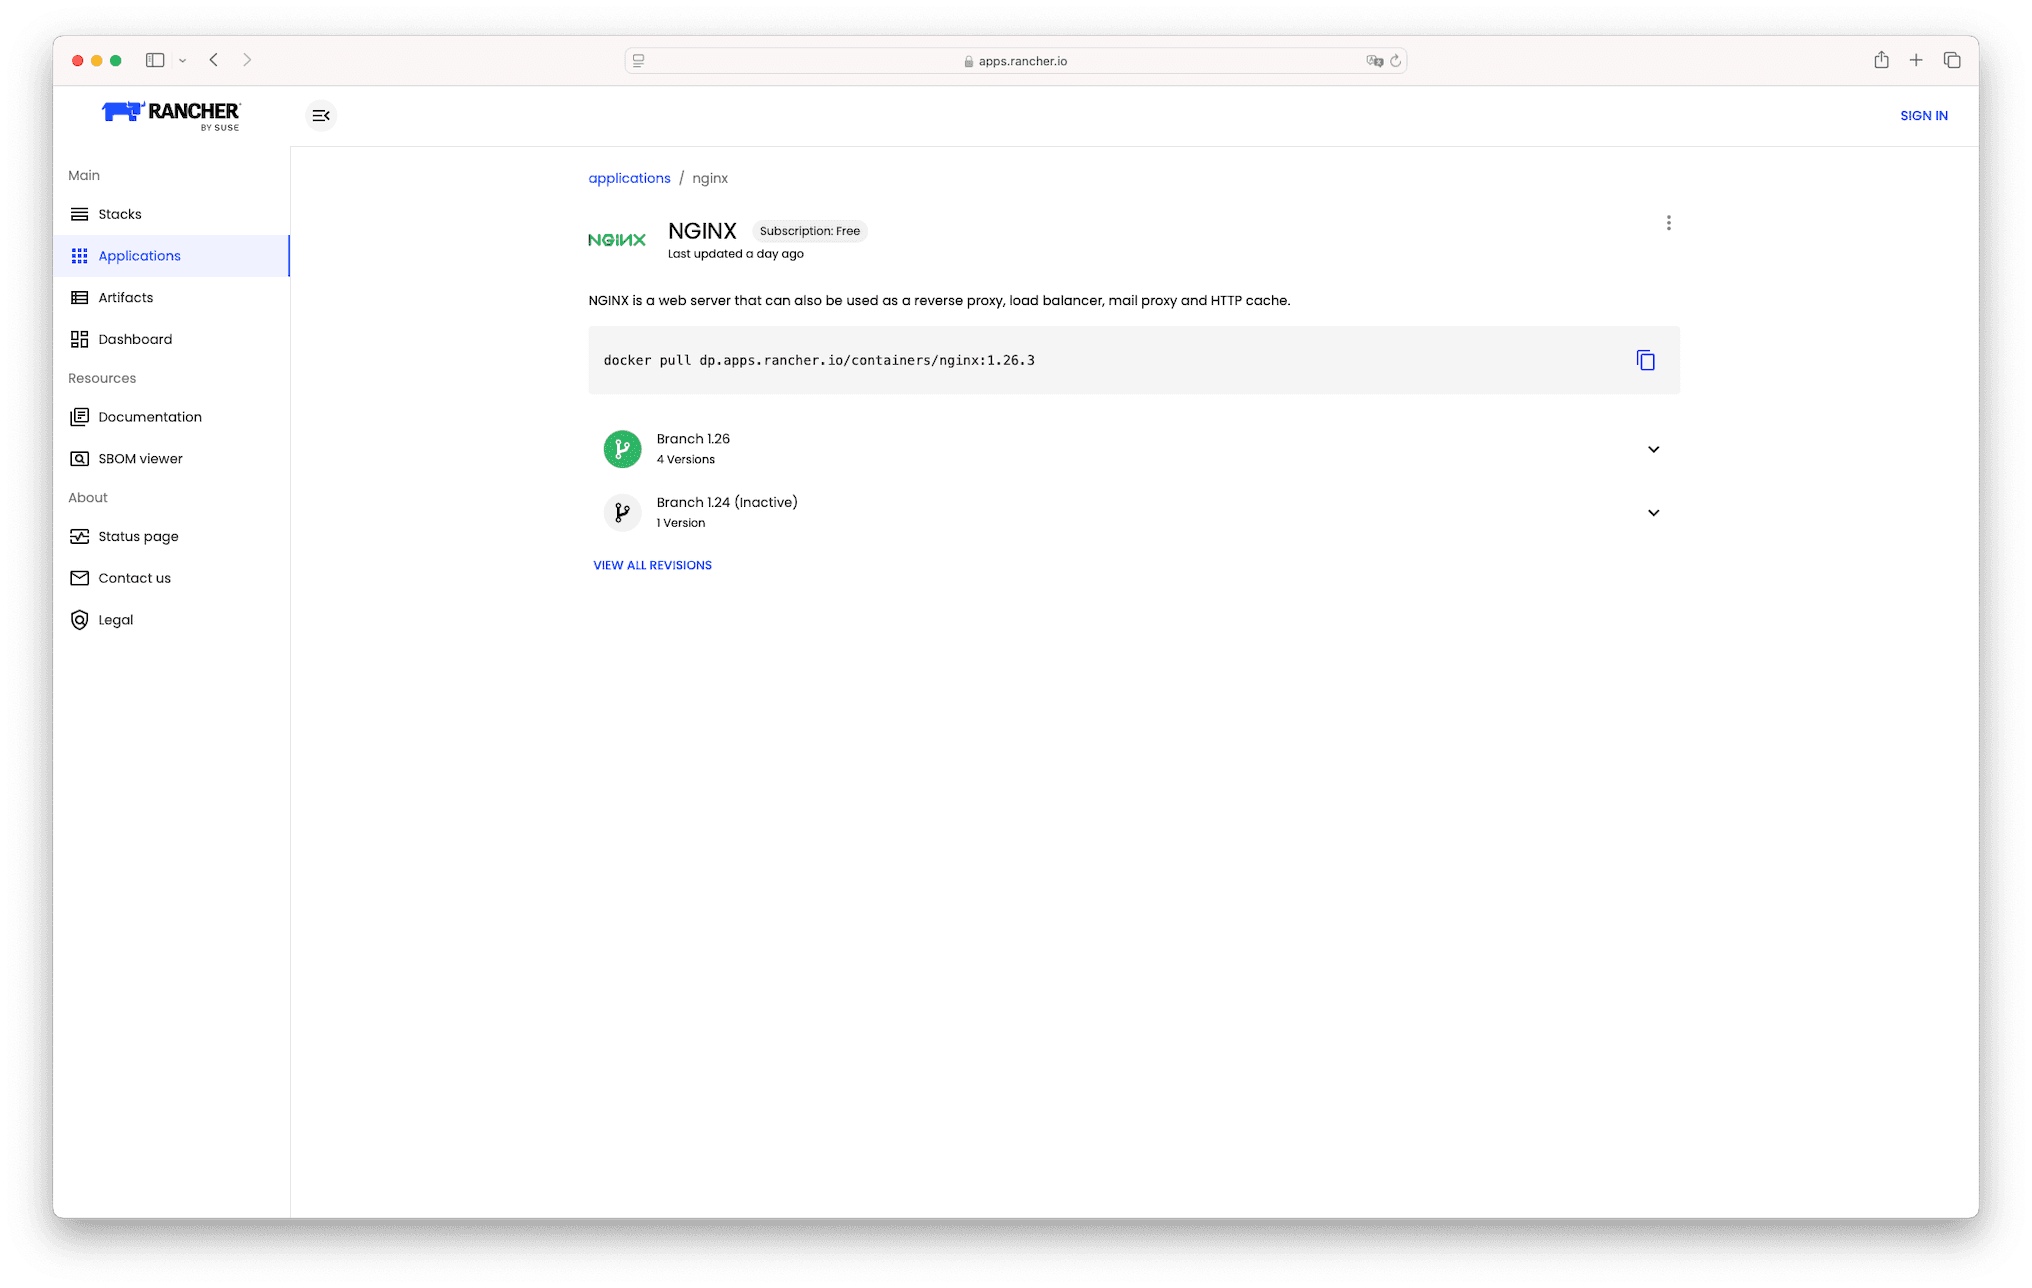
We can see that:
- There’s already a sample
docker pullcommand for the latest version available. - There’s support for the branch
1.26. Clicking on the collapse, the web application shows us the latest versions and revisions that have been built. If we want to have even more details about each artifact, clicking on the row will redirect you to the artifact details page. - There are also builds for the inactive branch
1.24. We will avoid using inactive branches, since the upstream won’t provide support for the versions within it.
At the moment of writing, the latest version available is dp.apps.rancher.io/containers/nginx:1.26.3. We will use that for the next commands.
Create a nginx.conf file:
events {
  worker_connections 1024;
}

http {
  server {
    listen 80;
    location / {
      root /www/data;
    }
  }
}
Create an index.html file:
<!doctype html>
<html>
  <head>
    <title>Application Collection NGINX!</title>
    <meta charset="utf-8" />
  </head>
  <body>
    <h1>
      Hello World!
    </h1>
  </body>
</html>
Finally, run the NGINX image:
docker run -d --name nginx -p 8080:80 \
    -v ./nginx.conf:/etc/nginx/nginx.conf \
    -v ./index.html:/www/data/index.html \
    dp.apps.rancher.io/containers/nginx:1.26.3
🎉 After a couple of seconds, you can open up your browser of choice and see the Hello World page in http://localhost:8080.