Integrate with Dependency-Track

Dependency-Track is a continuous SBOM analysis platform that allows organizations to identify and reduce risk in the software supply chain.
In this guide, you will learn how to:
- Define a Dependency Track Project following our Application/Component/Branch/Version structure.
- Manually feed CycloneDX SBOMs from Application Collection.
- Feed CycloneDX SBOMs combining Dependency-Track and Application Collection REST APIs.
- Audit vulnerabilities and label potential false positives.
Make sure you are familiar with our terms before reading this guide.
Prerequisites
The only requirement in order to follow this how-to is having a Dependency-Track server already running (for this demonstration, we will use the containerized way ).
We will work with Alertmanager . Although it is not required, we suggest you to use the same artifacts, so you will get similar results.
Set up a project
If you open up the Alertmanager page, you will see that it is an application made of 2
components: Alertmanager and Prometheus Config Reloader.
First, we will define the Alertmanager application. For this step, go to the sidebar and select Projects. On the new page, click on
Create Project and fill the following required values:
- Project Name: Alertmanager (Application)
- Version: 0
- Classifier: Application
For the Project Name we picked the Application Collection application name.
Notice that we wrote 0 (the component branch) instead of 0.27.0 (the latest component version at the time of writing) as version. Let’s
say that our company policy is to update the applications running in production as new compatible versions are released. Thus, we will want
to track the vulnerabilities as both, new revisions and versions are released.
However, if your preferences are more restrictive, you will want to set 0.27.0 as version, and only track the vulnerabilities between new
revisions.
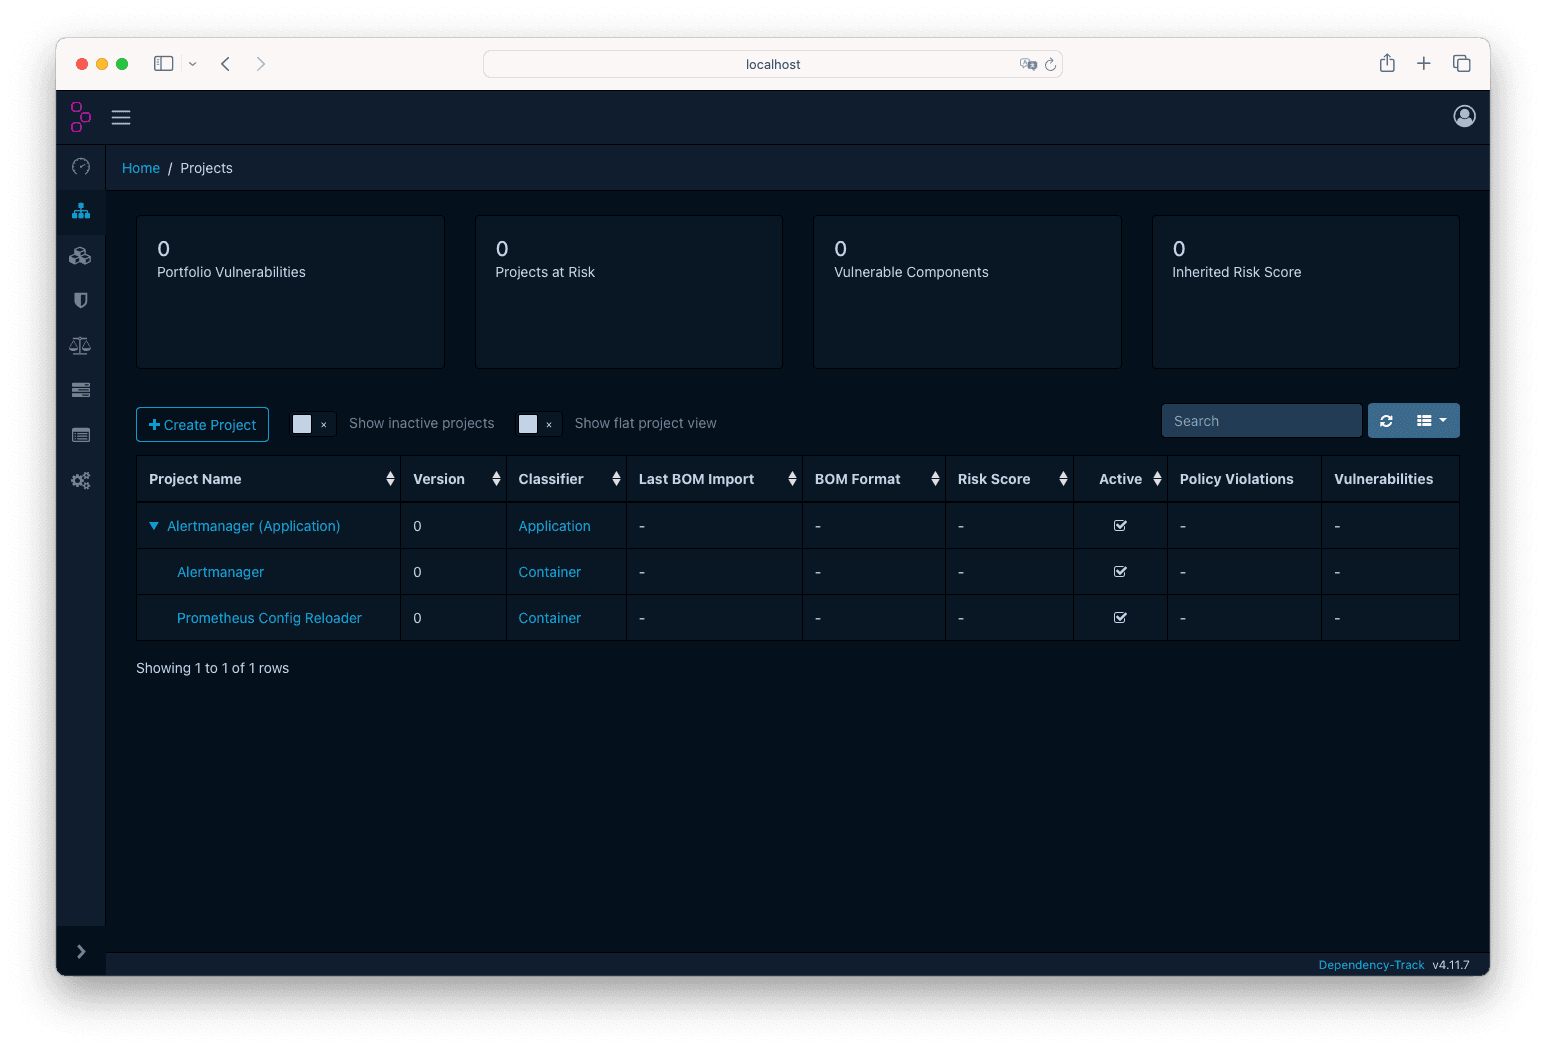
Next, we will define the Alertmanager and Prometheus Config Reloader components, with some slight differences. Take this as an example:
- Project Name: Prometheus Config Reloader
- Version: 0
- Classifier: Container
- Parent: Alertmanager (Application): 0
This is how it should look like at the end:
Feed a CycloneDX SBOM
Manually
At this point you have a project defined, but no components or vulnerabilities listed. In this step you will upload some SBOMs forAlertmanager
and Prometheus Config Reloader components.
Open up the Alertmanager revisions page to see all the builds and
look for the first revision: ec1feb7. If you can’t find it, click here .
Then, download the CycloneDX SBOM by clicking on the download icon next to the image. You will get a file named alertmanager-0.27.0-1.1.x86_64.cdx.json.
Do the same for the first revision of
Prometheus Config Reloader: f4dfa09. If you can’t find it, click here .
You will get a file named prometheus-config-reloader-0.76.1-1.1.x86_64.cdx.json.
Now, go to Dependency-Track and open Alertmanager (you want to open the container, not the application). In the new page, click on the
Components tab →Upload BOM button. Then select the alertmanager-0.27.0-1.1.x86_64.cdx.json. Once uploaded, click on the Refresh
icon button (or just reload the page), you will see the list of components:
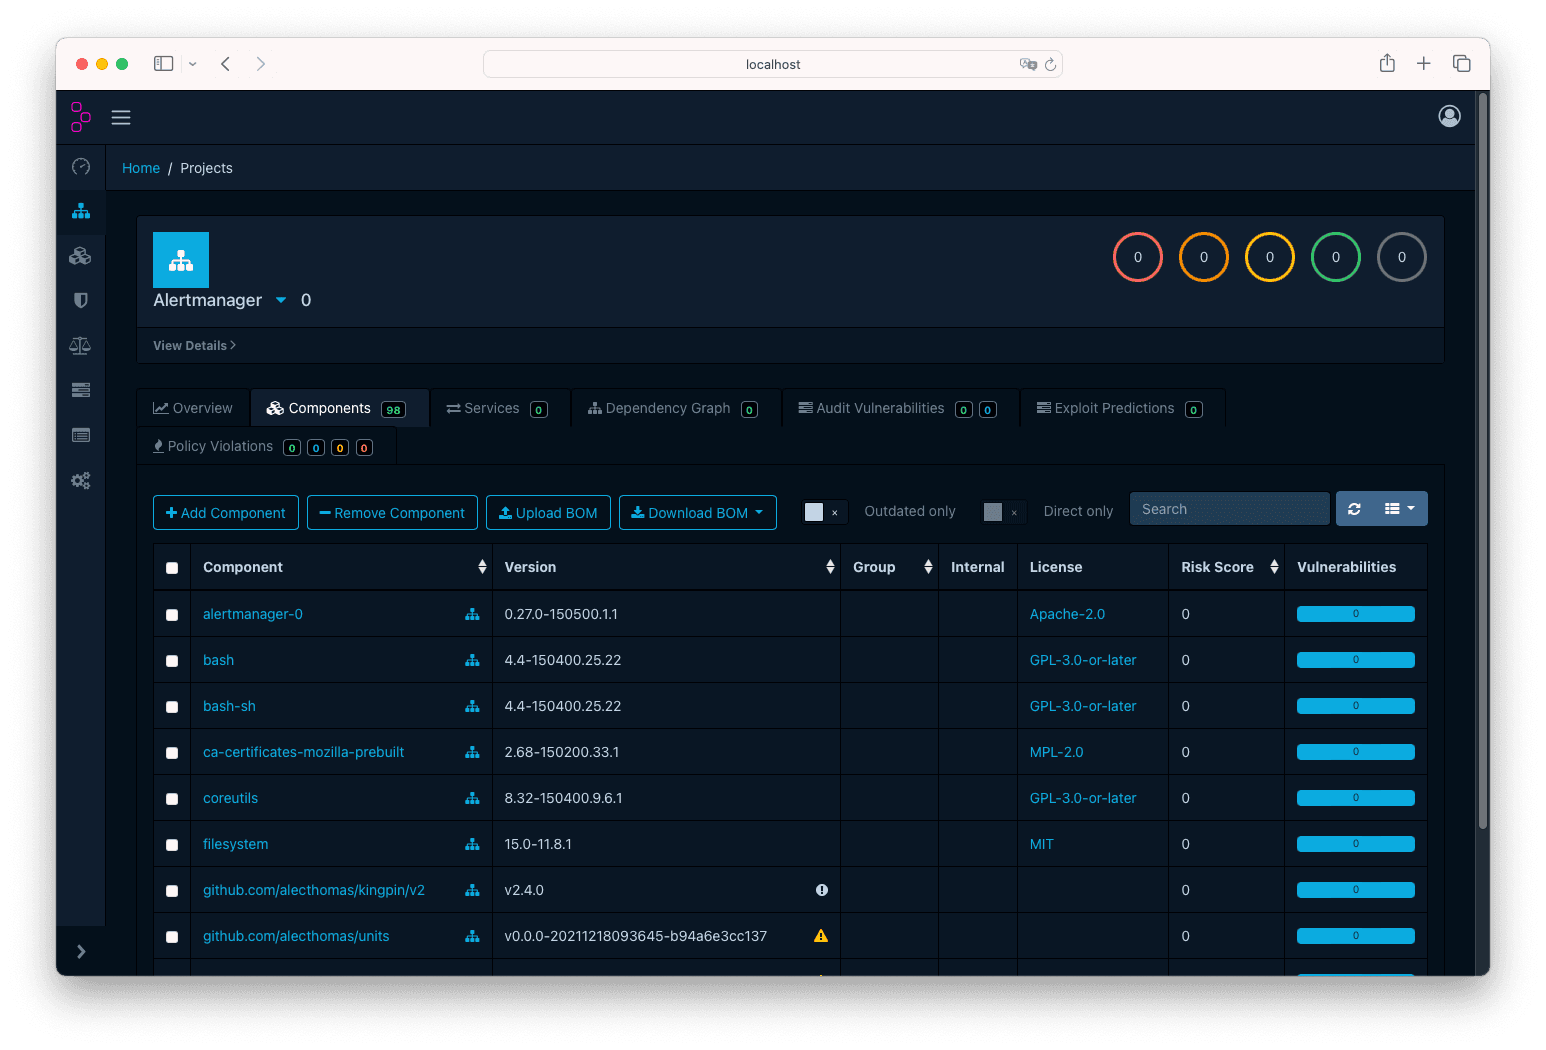
Do the respective for Prometheus Config Reloader.
Finally, go to the Dependency Track Dashboard, and click on the `Refresh icon button within the Portfolio Vulnerabilities card. After a couple of seconds you will see that the risk values increase: congratulations, you are now tracking Application Collection images 👏.
Through the REST APIs
The best implementation of this integration is though a machine-to-machine automated process, where you can assess the vulnerabilities of your applications in real time. To achieve this, you can automatically pull the SBOMs from Application Collection and then push them to Dependency-Track through their REST APIs.
Fetch the CycloneDX SBOM
For this step, it is key to be familiar with the Application Collection REST API .
First, you will need to discover the latest container images for the branch(es) of interest of each component. For that you will hit the getArtifacts
operation :
curl -X 'GET' 'https://api.apps.rancher.io/v1/artifacts?packaging_formats=CONTAINER&architecture=x86_64&component_slug_name=alertmanager&page_number=1&page_size=20' -H 'accept: application/json' |
jq '.items[] | select(.version | test("^0\\.\\d+\\.\\d+")) | select(.packaging_format=="CONTAINER") | .digest.value'
#"a326edf0e130351802a02a3f0f4d5f1406a64793f567fdea45e537745ff791d5"
#...
This is a paged endpoint. In your scripts you will need to iterate the pages until you reach the latest artifact you registered in Dependency-Track.
Then, you can get each CycloneDX sbom with the getArtifactResources operation :
$ curl -X 'GET' \
    'https://api.apps.rancher.io/v1/artifacts/a326edf0e130351802a02a3f0f4d5f1406a64793f567fdea45e537745ff791d5/resources?type=SBOM&format=CYCLONEDX' \
    -H 'accept: application/*'
Feed the CycloneDX SBOM
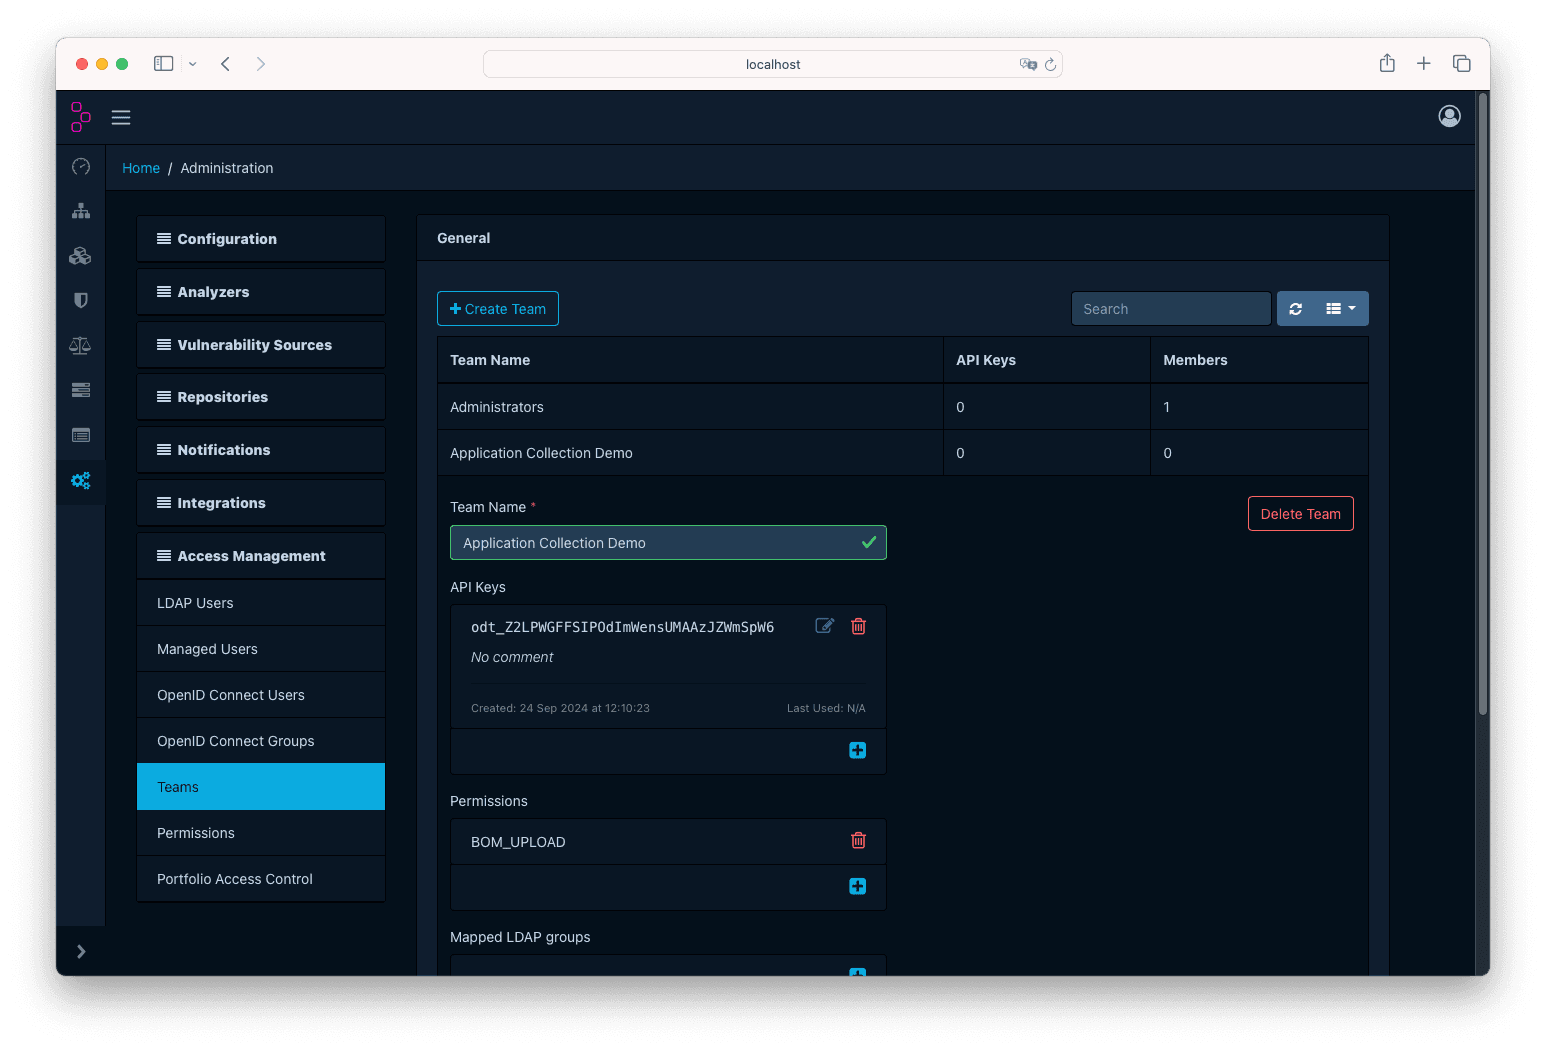
In order to use the REST API of Dependency-Track, you will need to get an API Key. For that, open the Teams tab and create a new team. Finally,
make sure you add the BOM_UPLOAD permission. Then, create a new API Key:
Here we will follow the Continuous Integration & Delivery guide in Dependency-Track docs, but adapted to the examples used in the previous steps:
$ curl -X "POST" "http://localhost:8081/api/v1/bom" \
    -H 'Content-Type: multipart/form-data' \
    -H "X-Api-Key: odt_Z2LPWGFFSIPOdImWensUMAAzJZWmSpW6" \
    -F "autoCreate=false" \ # Set to true if you did not follow the previous steps
    -F "projectName=Alertmanager" \
    -F "projectVersion=0" \
    -F "bom=@$(pwd)/alertmanager-0.27.0-3.3.x86_64.cdx.json"
{"token":"a421f422-8a76-4933-a7a3-0e3b541e3ed4"}
Make sure you use the apiserver-host:port, and not the frontend values!
At this point, the SBOM is loaded. You can check that the dependencies match through the Dependency-Track project page.
Audit vulnerabilities
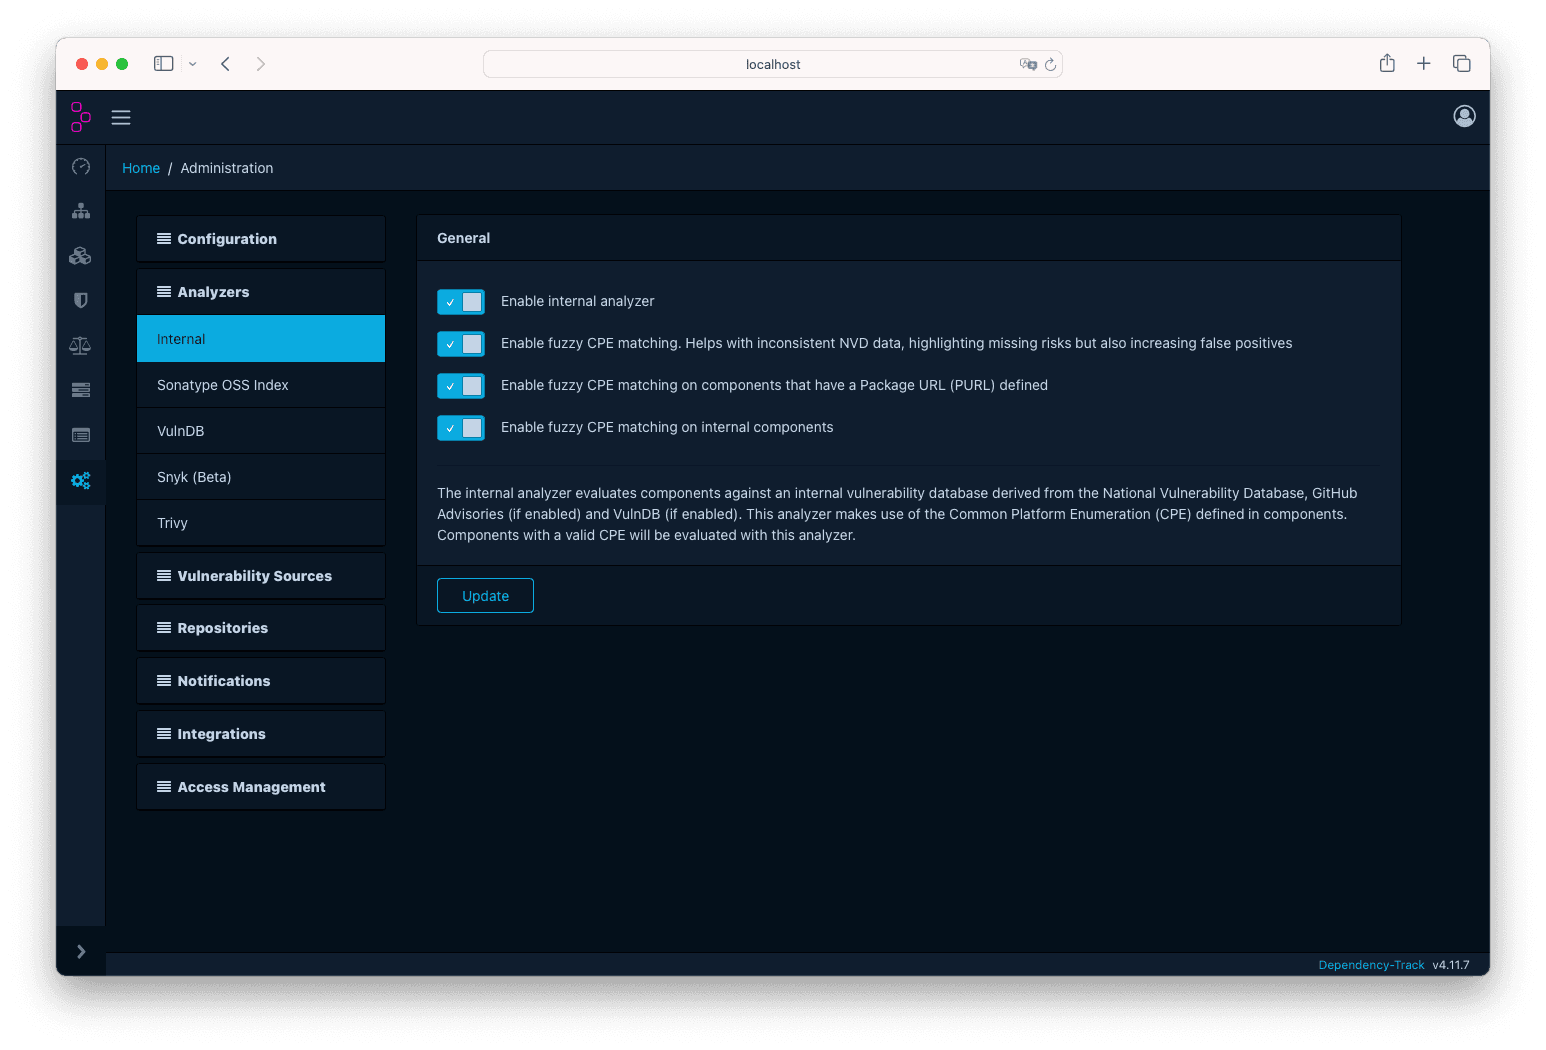
At some point Dependency-Track may report false positives/negatives and you will want to flag them. For this demonstration we will enable all the fuzzy CPE matchers to trigger some false positives, and then we will flag them accordingly. We will use the example shown in Set up a project.
First, go to the Administration tab, then click on Analyzers → Internal and enable all the toggle buttons below the General section.
Then click on Update:
After that, go to the Alertmanager project page, and upload the CycloneDX of this revision .
Note how the CVE-2010-4756 is not listed in the Application Collection page.
Go back to Dependency-Track and refresh the vulnerabilities, you will see that the Inherited Risk Score increased a lot.
Now let’s dive into the Vulnerability Audit page. If you search on the left aside by CVE-2010-4756, you will see that apparently glibc
from Alertmanager is affected. However, this is a false positive: SUSE already patched this bug
many years ago. Let’s flag it.
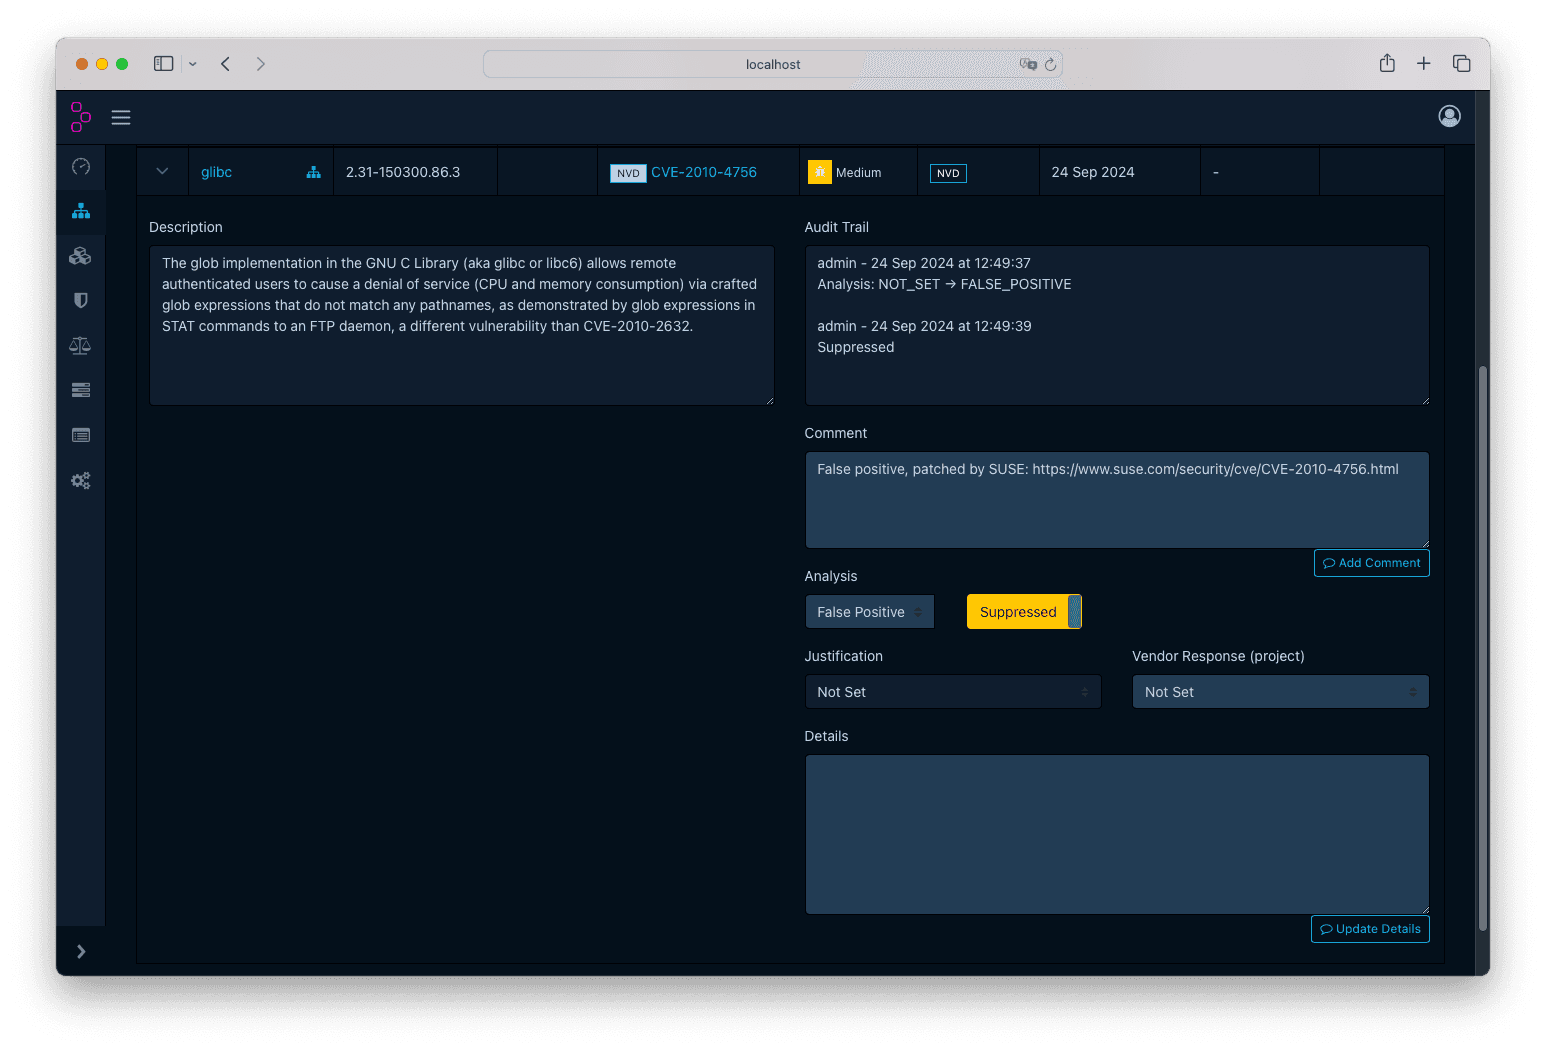
Click on the CVE name, this will take you to the vulnerability details page. From there, click on the Affected Projects tab, and click on
Alertmanager. This will open up a page where you can audit this specific vulnerability. Now, on the right side, you can write a comment explaining
why are you marking it as false positive, and you can change the Analysis picker to False Positive:
Finally, if you go back to the Dashboard, you will see that the Inherited Risk Score flattened, and that the Portfolio Vulnerabilities decreased accordingly.