Integrate with Rancher Manager

In this guide, we walk through the basics to configure the Application Collection OCI registry in your Rancher cluster, and how to quickly install a demo app. You will learn to:
- Add the Application Collection OCI registry to your cluster so its applications are available in the Apps section.
- Configure the cluster secrets so it can pull the workloads’ images.
- Configure the Application Collection charts to use the proper
imagePullSecrets.
Basic knowledge about Kubernetes , Helm and Rancher is required before following the instructions.
Prerequisites
In order to simplify the developer experience, this guide will work on a single-node Rancher instance on top of Rancher Desktop, with the Kubernetes feature enabled. You can have the same working scenario by following the steps described here .
Authentication to Application Collection will be required from the first step, so make sure you already have a working account at Application Collection .
Set up the OCI registry
Before configuring the registry, you will need either a username/access token pair or a service account/secret pair. If you are not familiar with these terms, read this guide in advance. Store the pair somewhere safe, as it will be used in further steps.
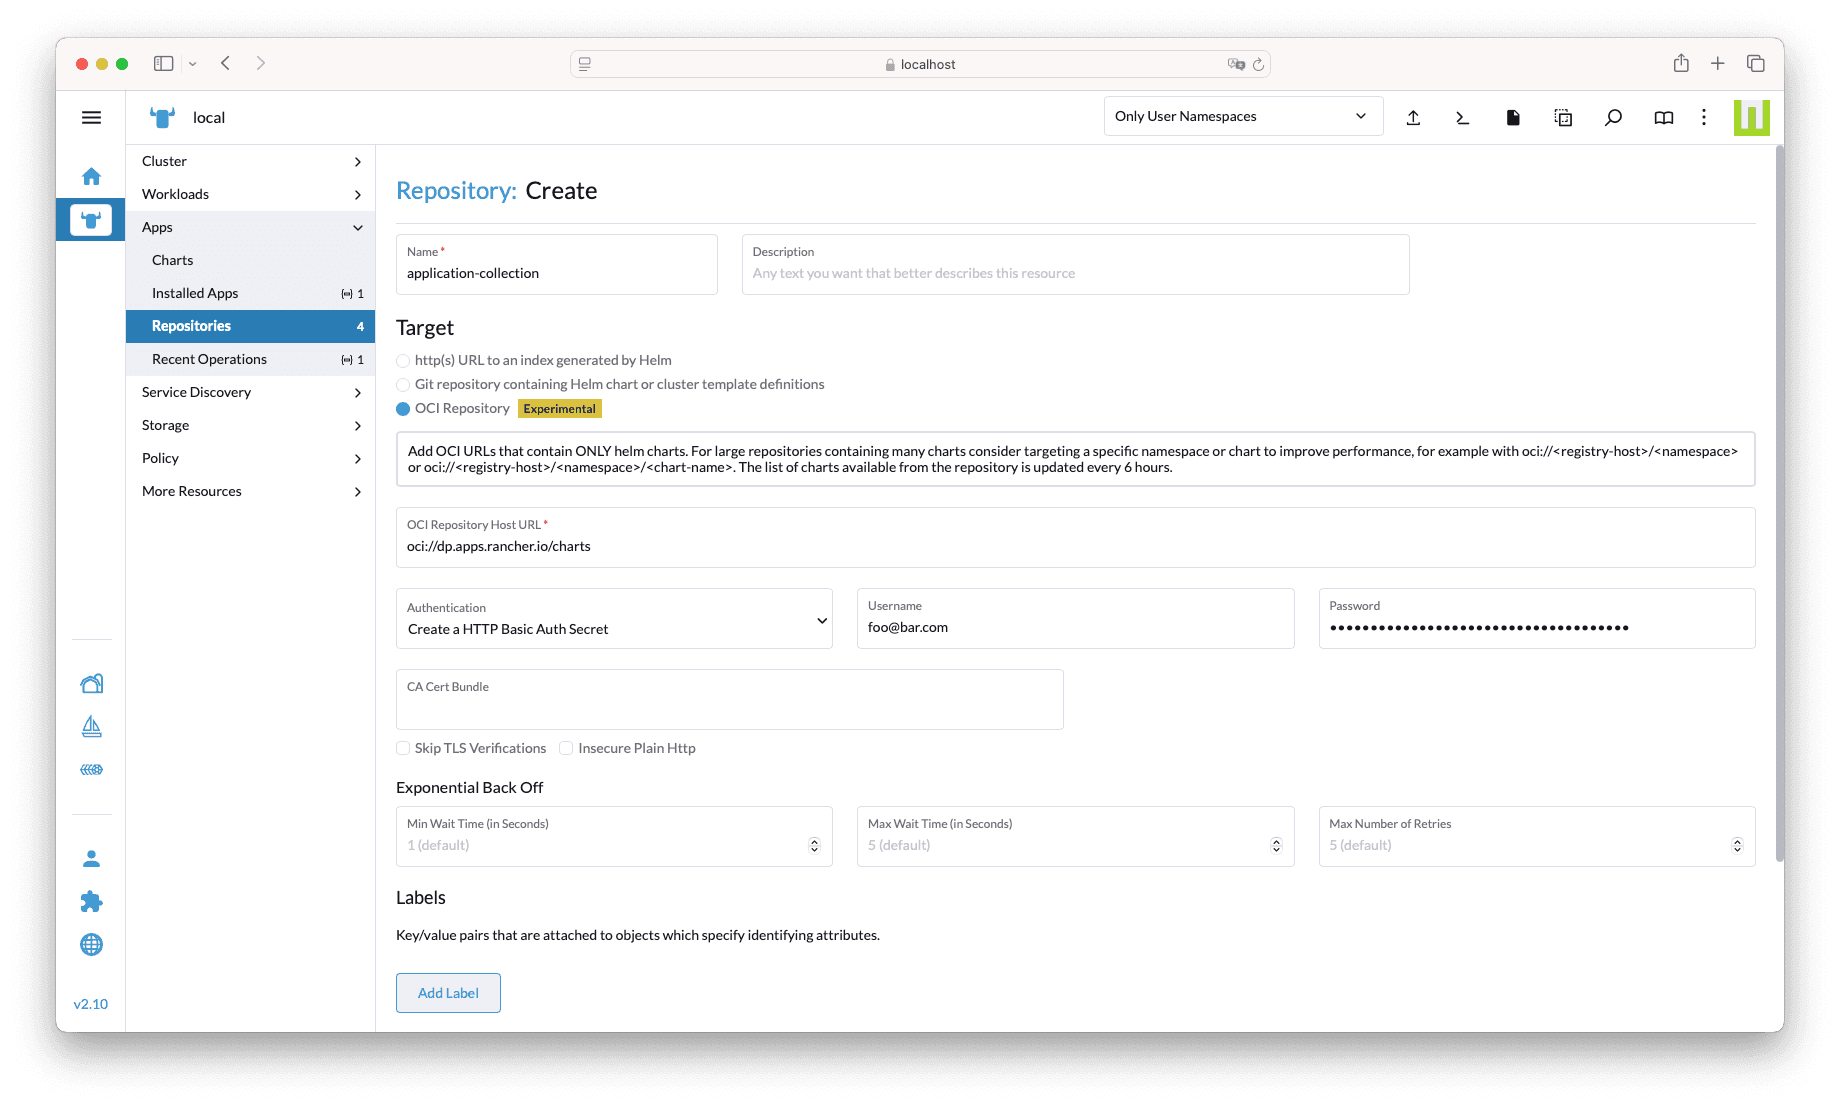
First of all, we will configure the OCI registry in our target cluster. For this demonstration, we will select the local cluster, and from
there navigate to Apps → Repositories and click on Create button.
In the form, set the following values (you may use custom, meaningful, values for some of the inputs):
- Name: application-collection
- Description: leave this empty
- Target: OCI Repository
- OCI Repository Host URL:
oci://dp.apps.rancher.io/charts - Authentication: Create a HTTP Basic Auth Secret
- Username: the Application Collection user account or service account username
- Password: the Application Collection access token or service account secret
Nothing else is required apart from these. Feel free to customize the rest of the form inputs if needed.
You should get something similar to this picture:
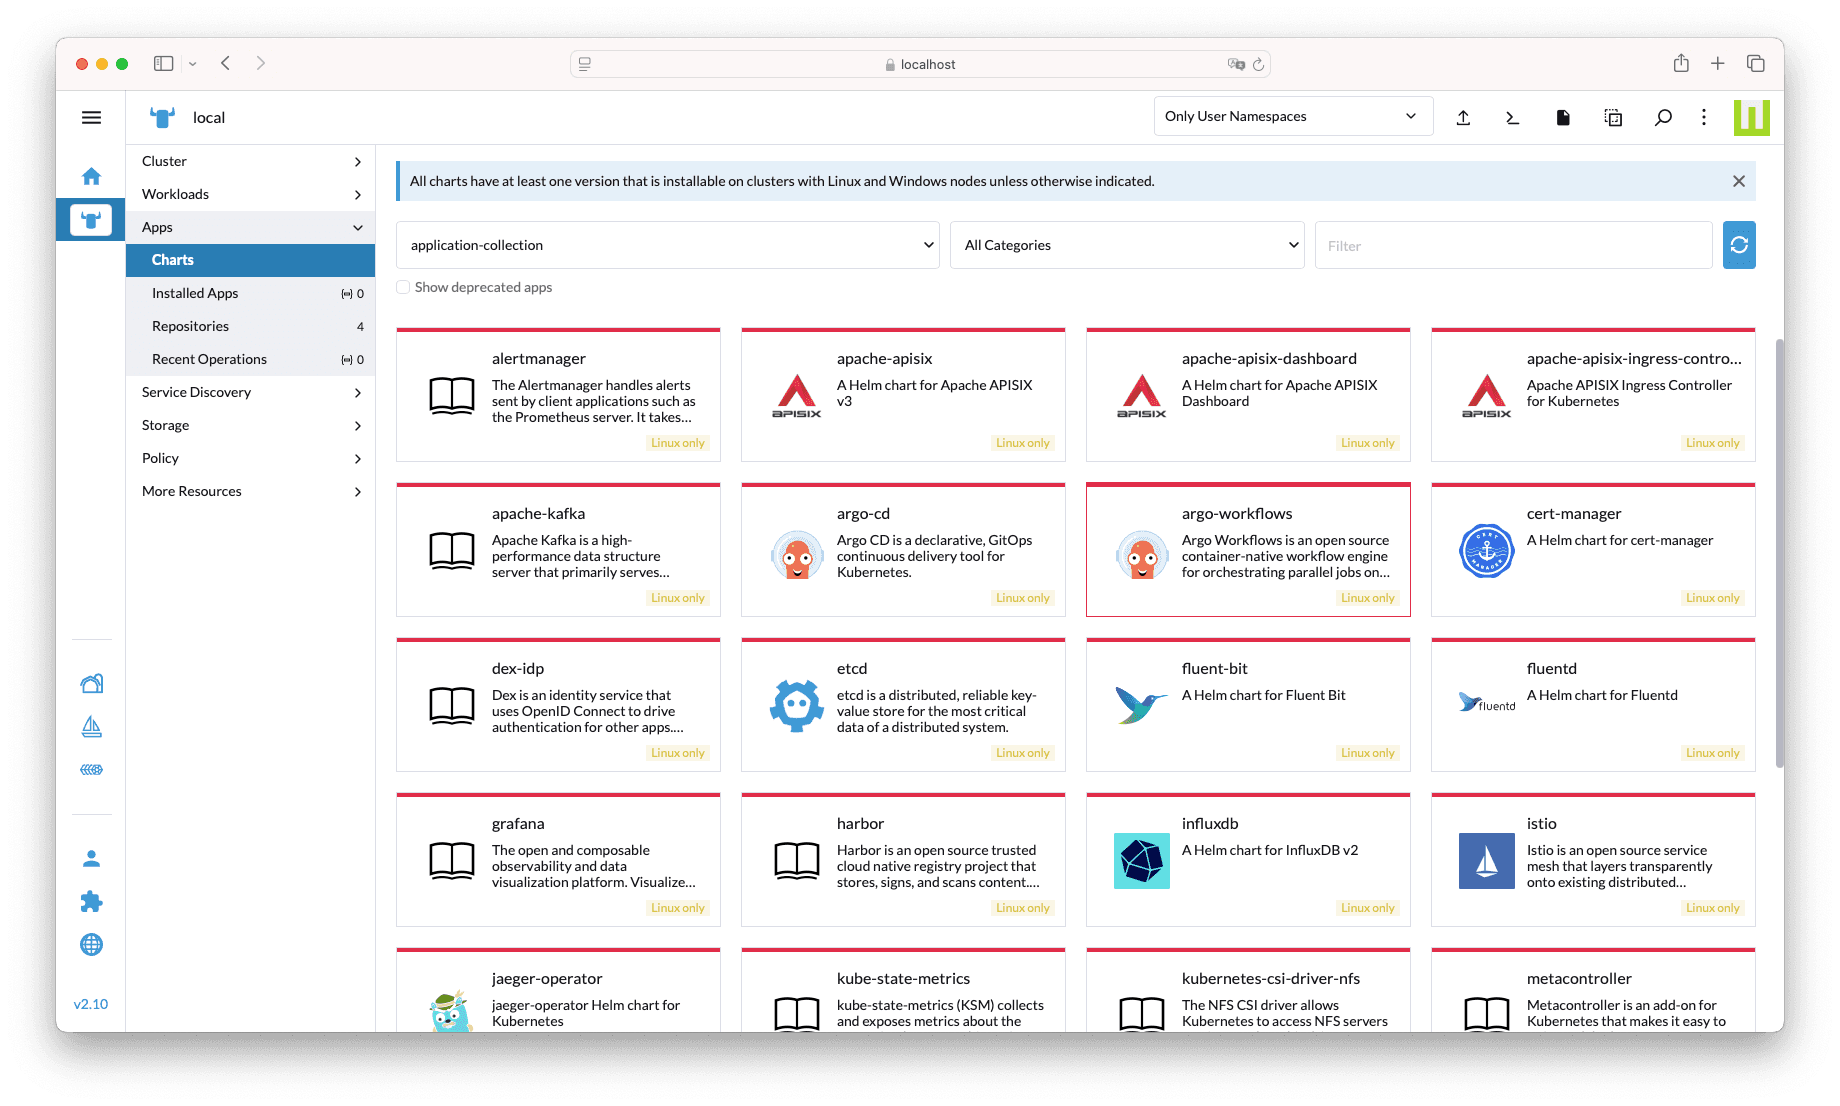
Once saved, after a few minutes you should see the collection navigating to Apps → Charts and filtering the results by application-collection:
Configure the imagePullSecret
The charts provided by Application Collection use container images hosted in a private registry (just like the charts themselves). Before installing an application, the target cluster must be able to pull the workloads’ images from this registry.
There are two main ways to create the imagePullSecret:
- Create a secret with Rancher Manager in the target cluster.
- Create a
docker-registrysecret withkubectlconnected to the target cluster.
In this guide we will walk through the first option. If you prefer the second one, you can find more details here.
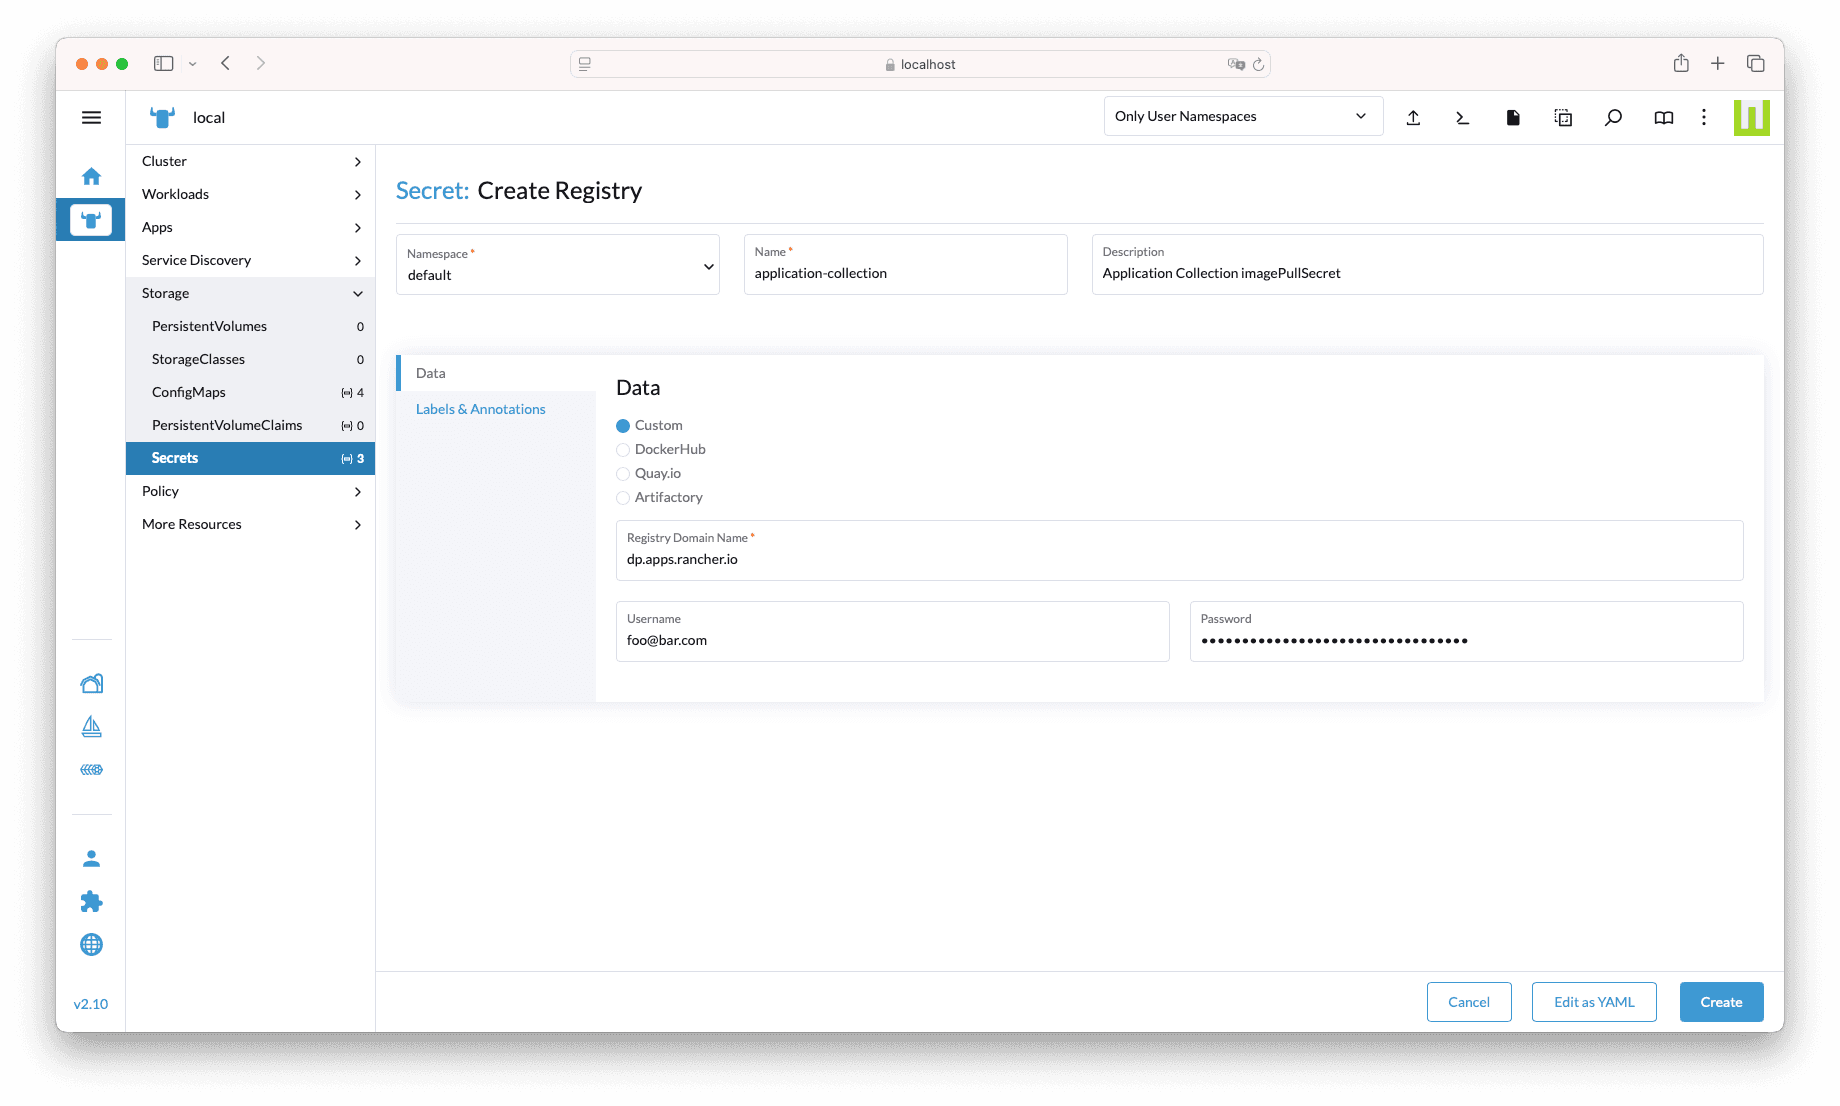
Select the local cluster, and then navigate to Storage → Secrets and click on the Create button. In the pop-up window, click on Registry
type.
In the form, set the following values (you may use custom, meaningful, values for some of the inputs):
- Name: application-collection
- Description: Application Collection imagePullSecret
- Registry Domain Name: dp.apps.rancher.io
- Username: the Application Collection user account or service account username
- Password: the Application Collection access token or service account secret
You should get something similar to this picture:
Install an application
For this example we will work with Grafana . However, note that every app within the collection follows the same values structure.
Go to the local cluster, and navigate to Apps → Charts. Then filter the results by application-collection and search for “grafana”.
Click on the resulting application. We will install the latest version at the time of writing 8.6.4, although this guide should work with
any other. Click on Install.
Name the app grafana-rm-howto, keeping the default namespace, and click on Next.
Now comes a key step: configuring the imagePullSecrets. For that, scroll down to the global section of the values YAML, and add “application-collection”
to the imagePullSecrets (if you used a different name in the previous step, use that one instead). You should
have something similar to this:
global:
# -- Global override for container image registry
imageRegistry: ""
# -- Global override for container image registry pull secrets
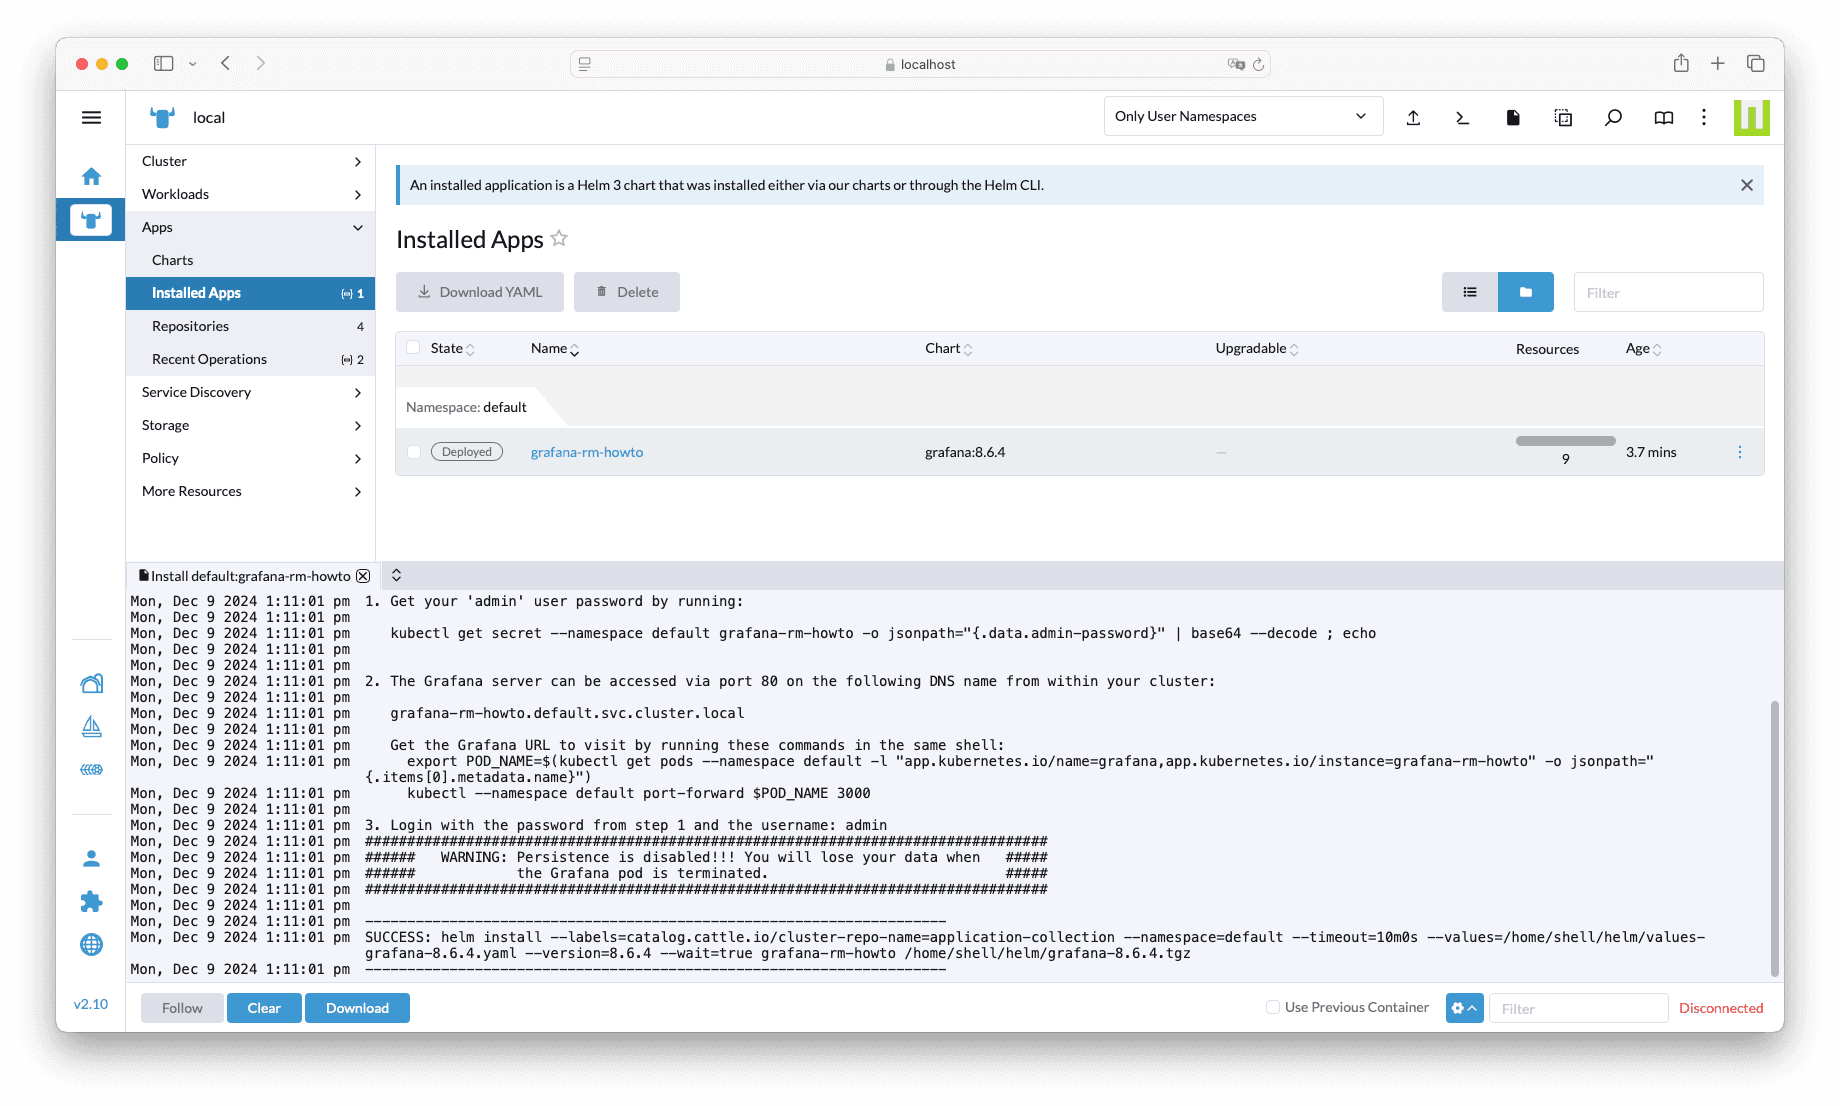
imagePullSecrets: ["application-collection"]Finally, click on Install. After a few seconds you should see the app successfully deployed in the cluster:
Bonus track: open up Grafana from Rancher Manager
Grafana has a web interface, let’s open it up to check that everything is working.
First, we will need the credentials for the admin user of Grafana. When we installed the Chart, our deployment created an Opaque secret with
random credentials in the cluster. Within the local cluster, navigate to Storage → Secrets and click on grafana-rm-howto (if you used
a different name for the app, use that one instead). Click on the Copy button for the admin-user and admin-password, and store the values
securely: you will need them to access the web UI.
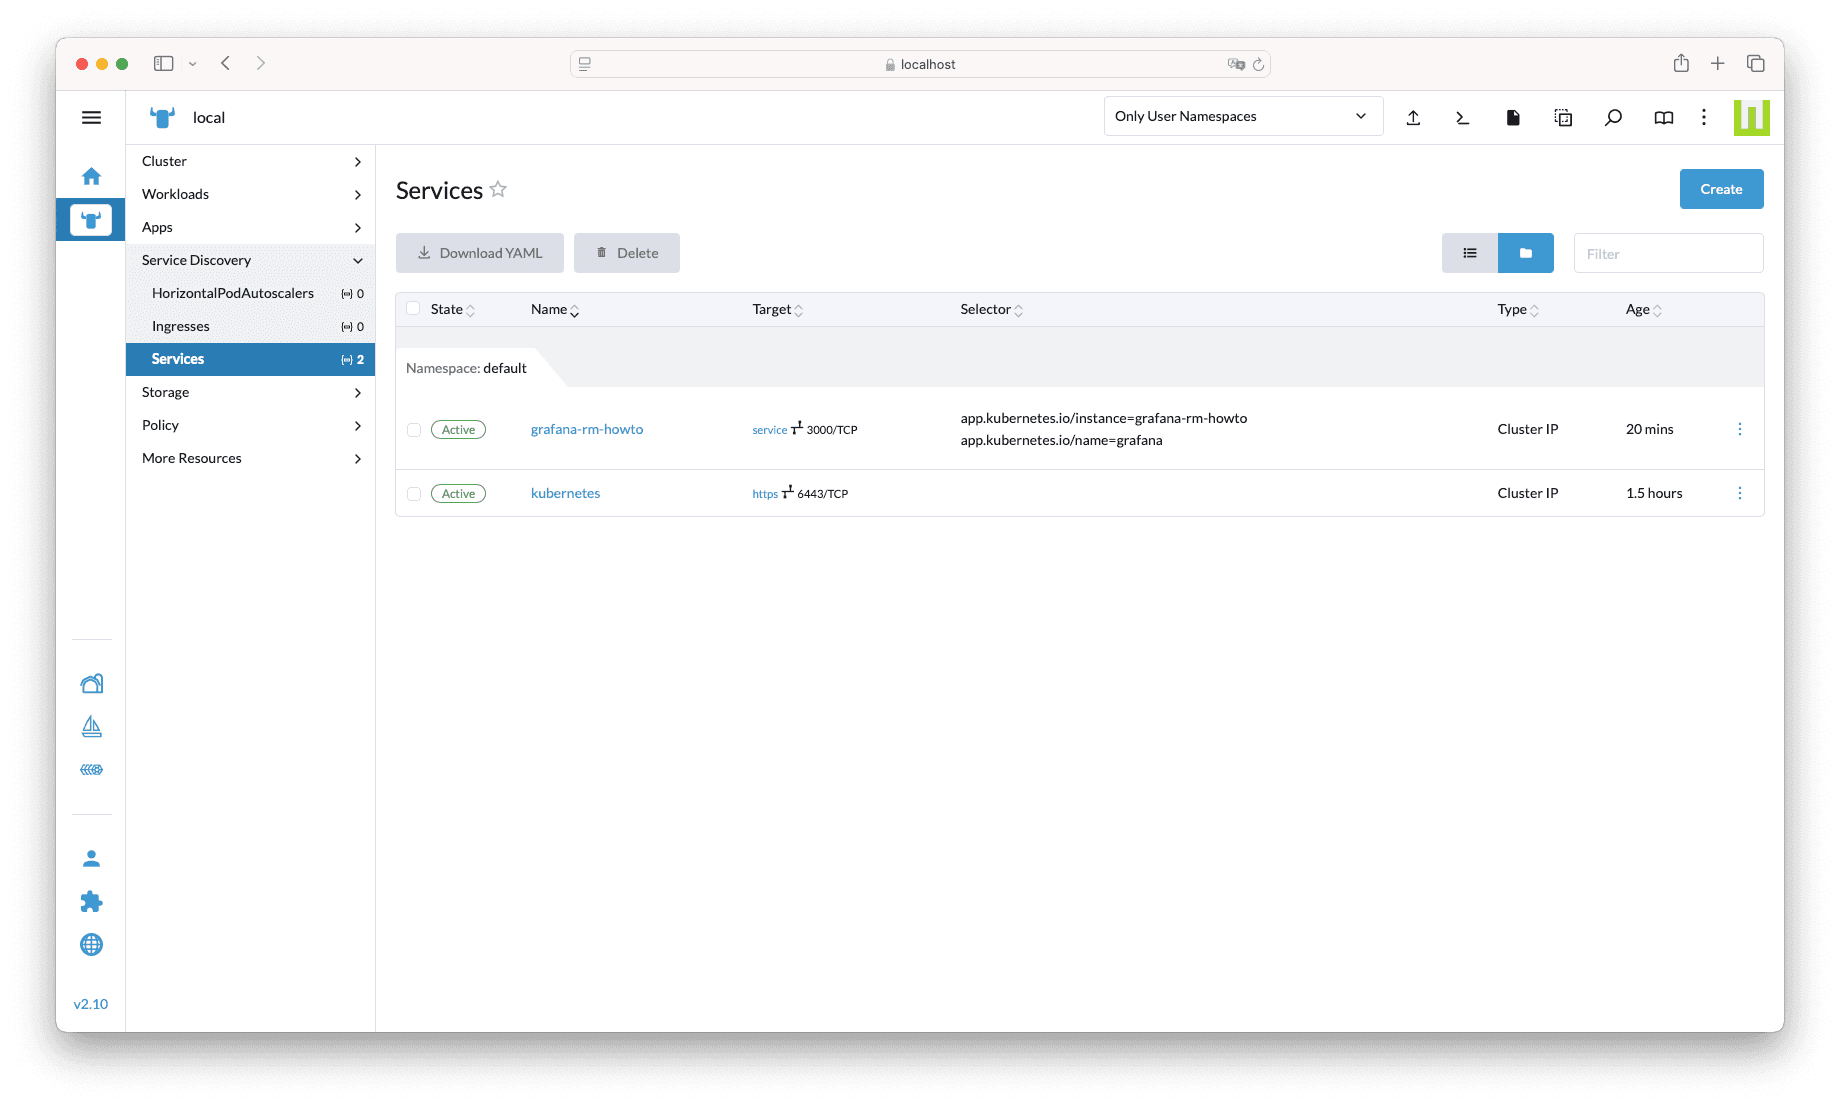
Then, within the local cluster, navigate to Service Discovery → Services and click on the “service” link in the grafana-rm-howto row:
This opens up Grafana in a new tab via Rancher Manager as a proxy. Click on Home in the top-left breadcrumbs, and insert the admin credentials.
This logs you in and, due to how the proxying works, redirects you back to Rancher Manager. If you repeat the process again, you will see that
now Grafana opens up with the admin user already logged in.